Emails for Shopify Messaging (formerly Shopify Email)
Besides Shopify notification emails, you can use RenderKu to curate visually appealing newsletters for Shopify Messaging (formerly Shopify Email). For Shopify Messaging, we will use custom-coded email feature which allows you to copy email HTML from RenderKu.
Install Shopify Messaging
First, make sure you've installed Shopify Messaging app to your store.
Create emails for Shopify Messaging
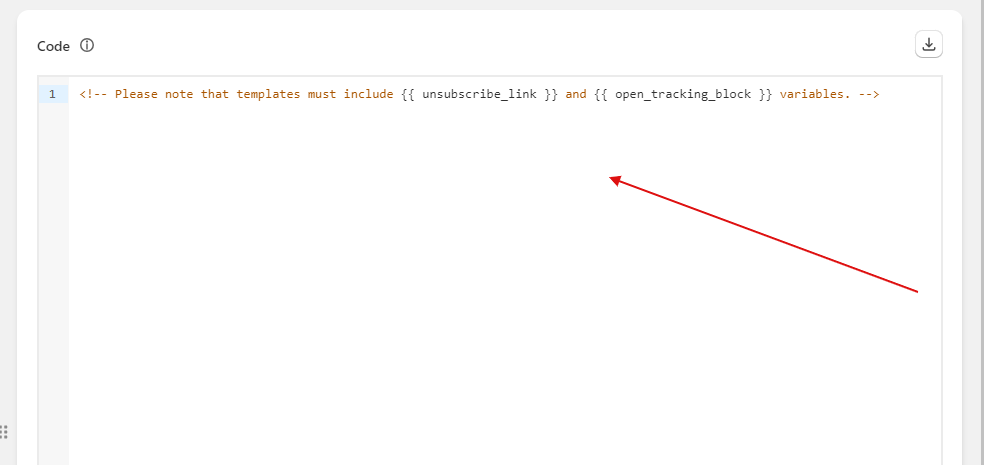
For Shopify Messaging, you need to make sure these 2 variables are used in your email, or you will get errors.
{{ unsubscribe_link }}{{ open_tracking_block }}
We'll walk you through how to set them up.
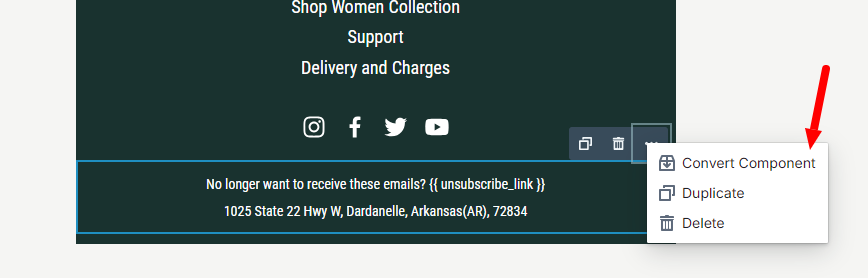
For {{ unsubscribe_link }}, add it inside your unsubscribe element.
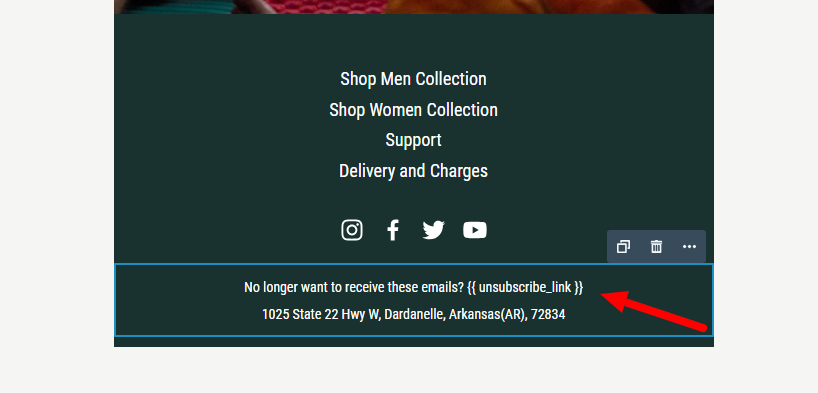
We recommend converting it to component so you can easily reuse them in future emails.
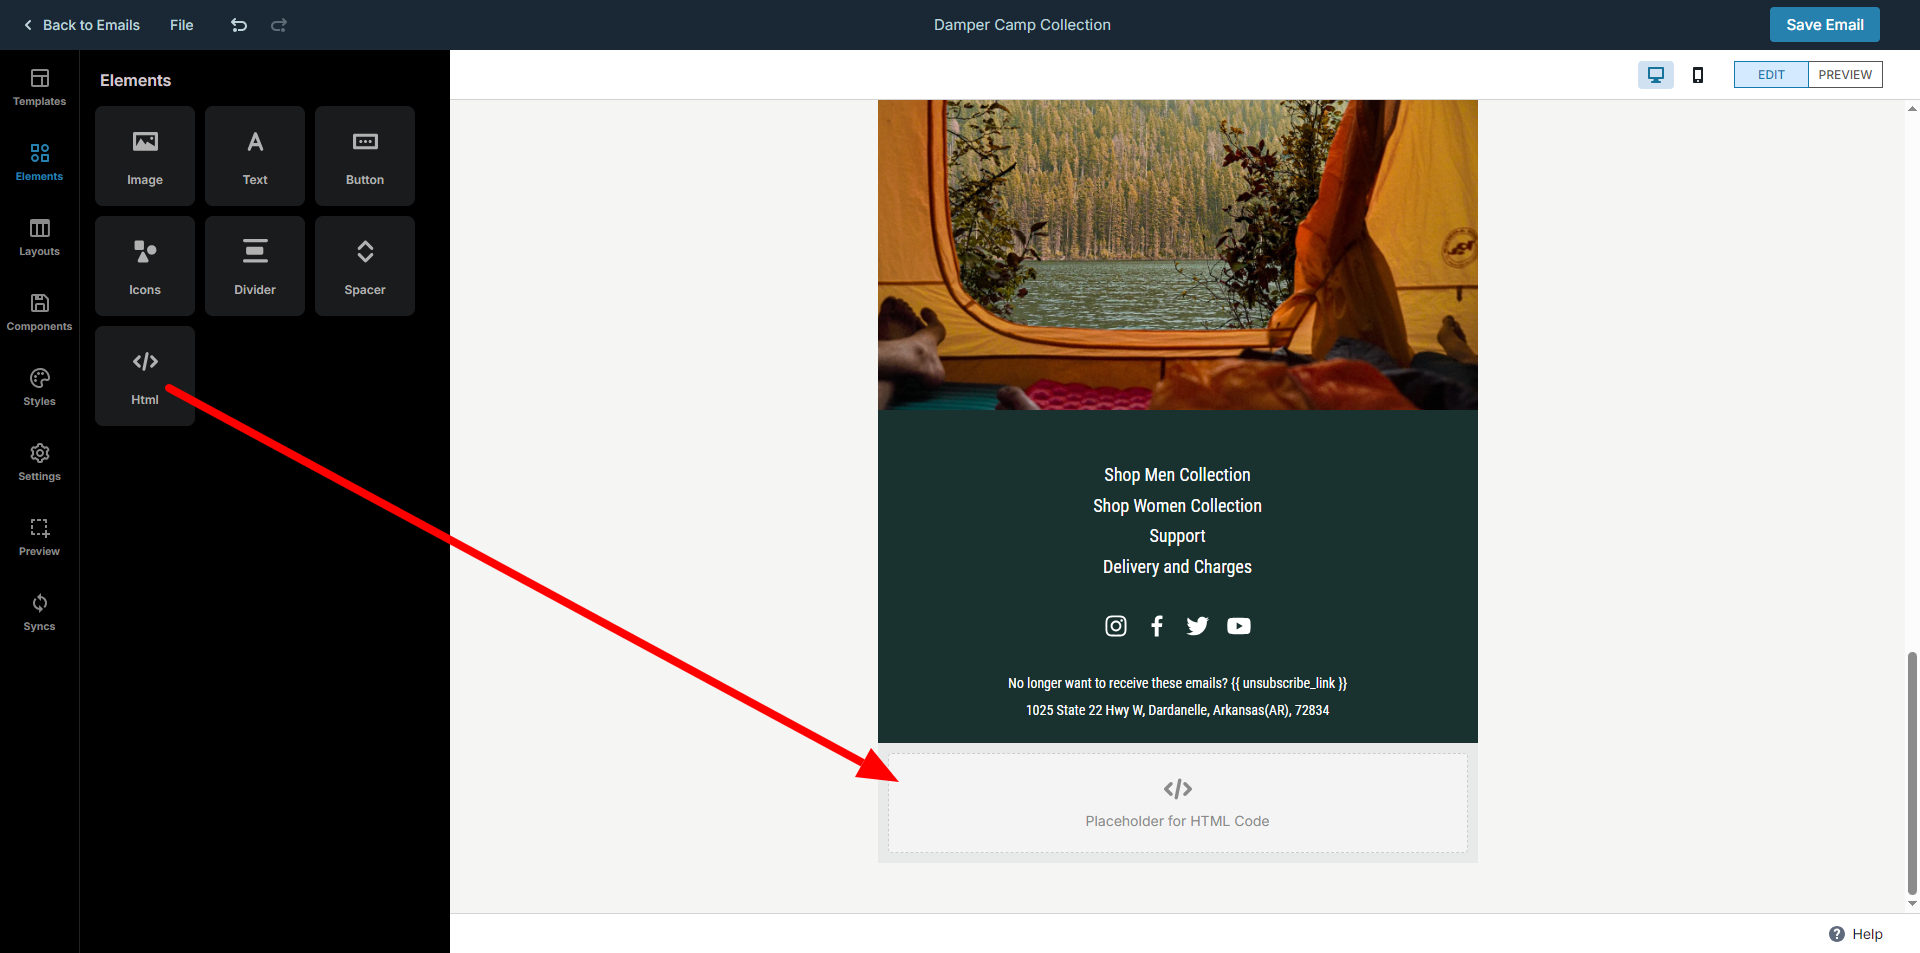
Next is {{ open_tracking_block }}, this is also mandatory for Shopify to be able to track opens in your email.
Drag a HTML element to the end of the email after all elements.
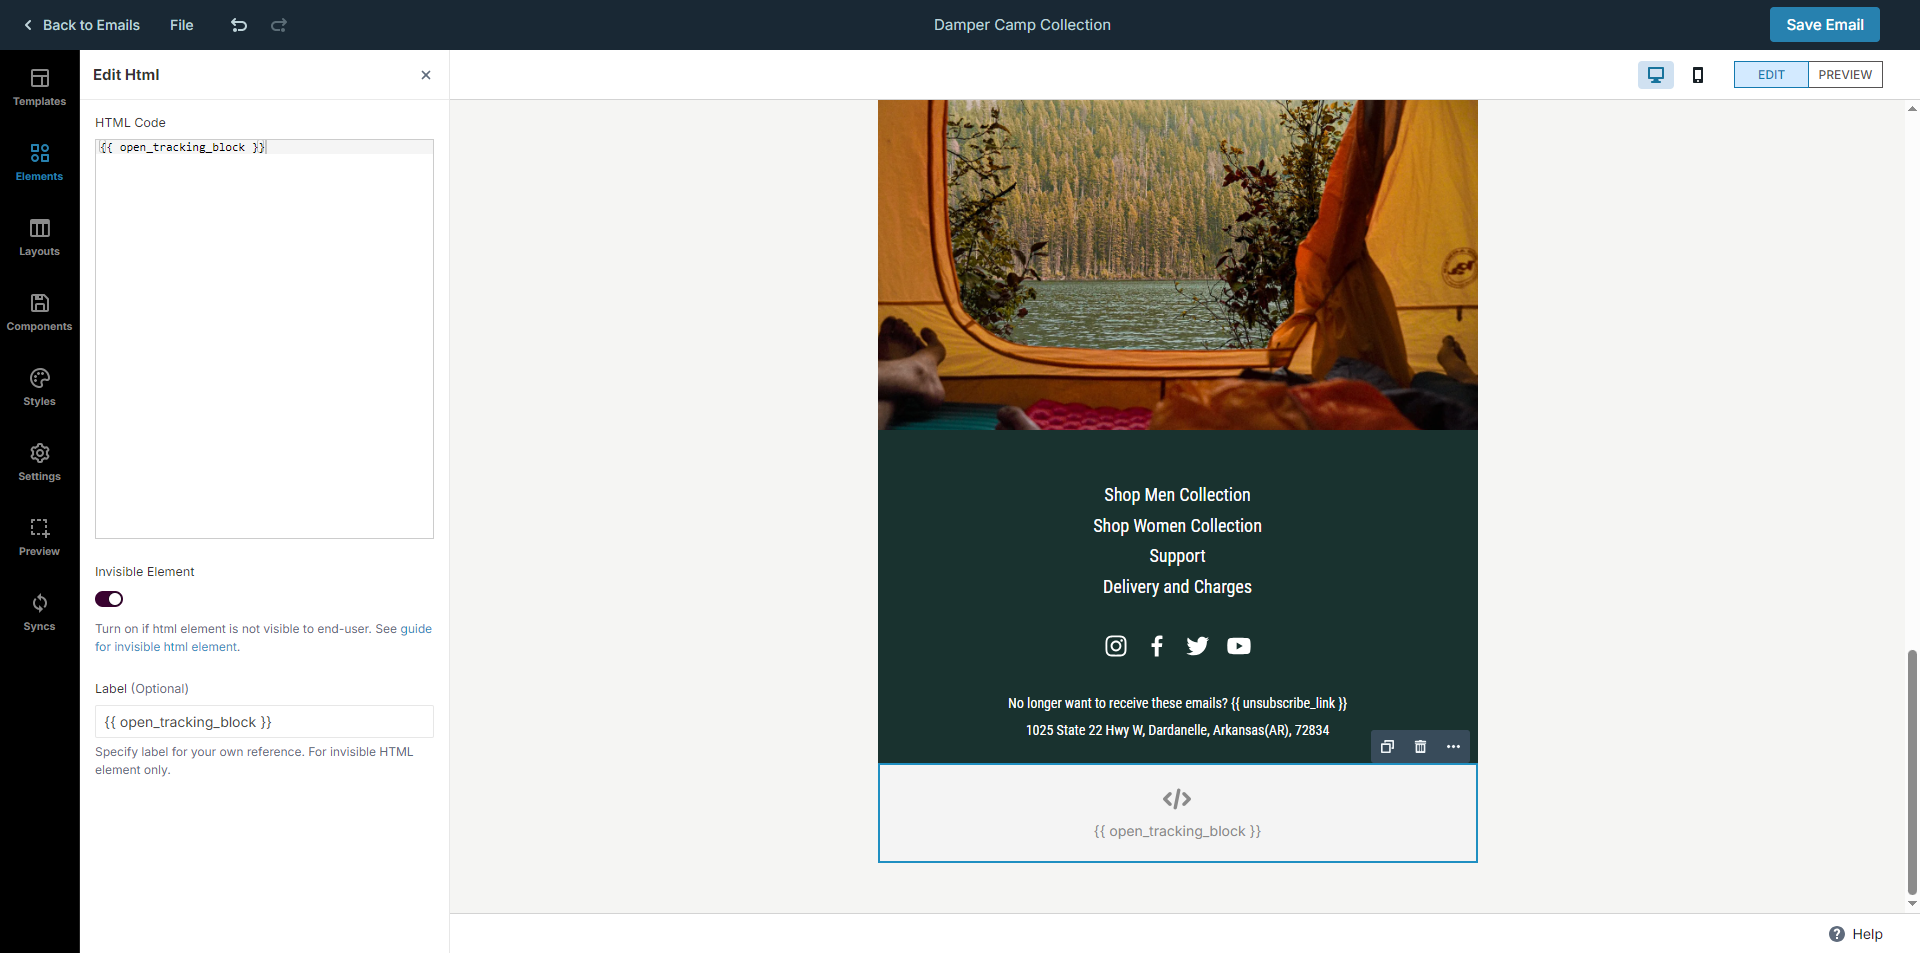
Specify
{{ open_tracking_block }}as HTML codeTurn on invisible element.
Specify
{{ open_tracking_block }}as label (Optional)We recommend converting it to component so you can easily reuse them in future emails. (Optional)

This is preview of how the email looks like. After that save the emai.
Export email html to Shopify Messaging
Before exporting html for email, ensure that you've added required variables to email (which we already did in previous step).
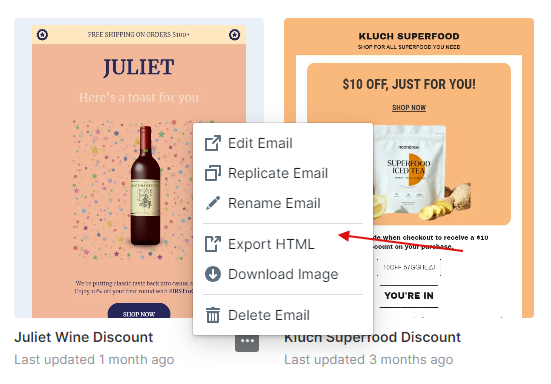
Go to your RenderKu emails page and right click on email you want to use. Then select Export HTML and copy HTML code for email.
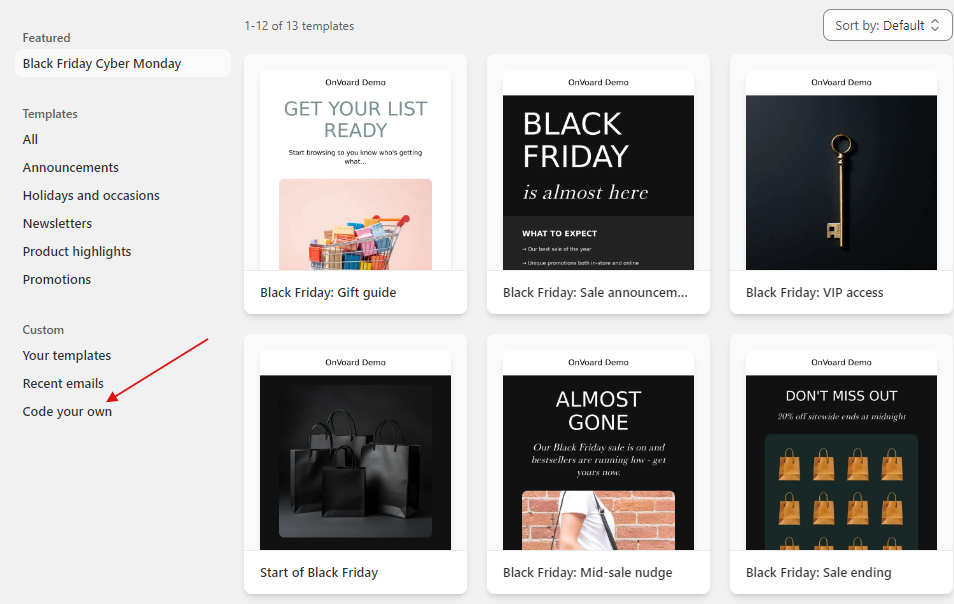
Go to create campaign for Shopify Messaging and select Code your own.
Paste email html to code section.
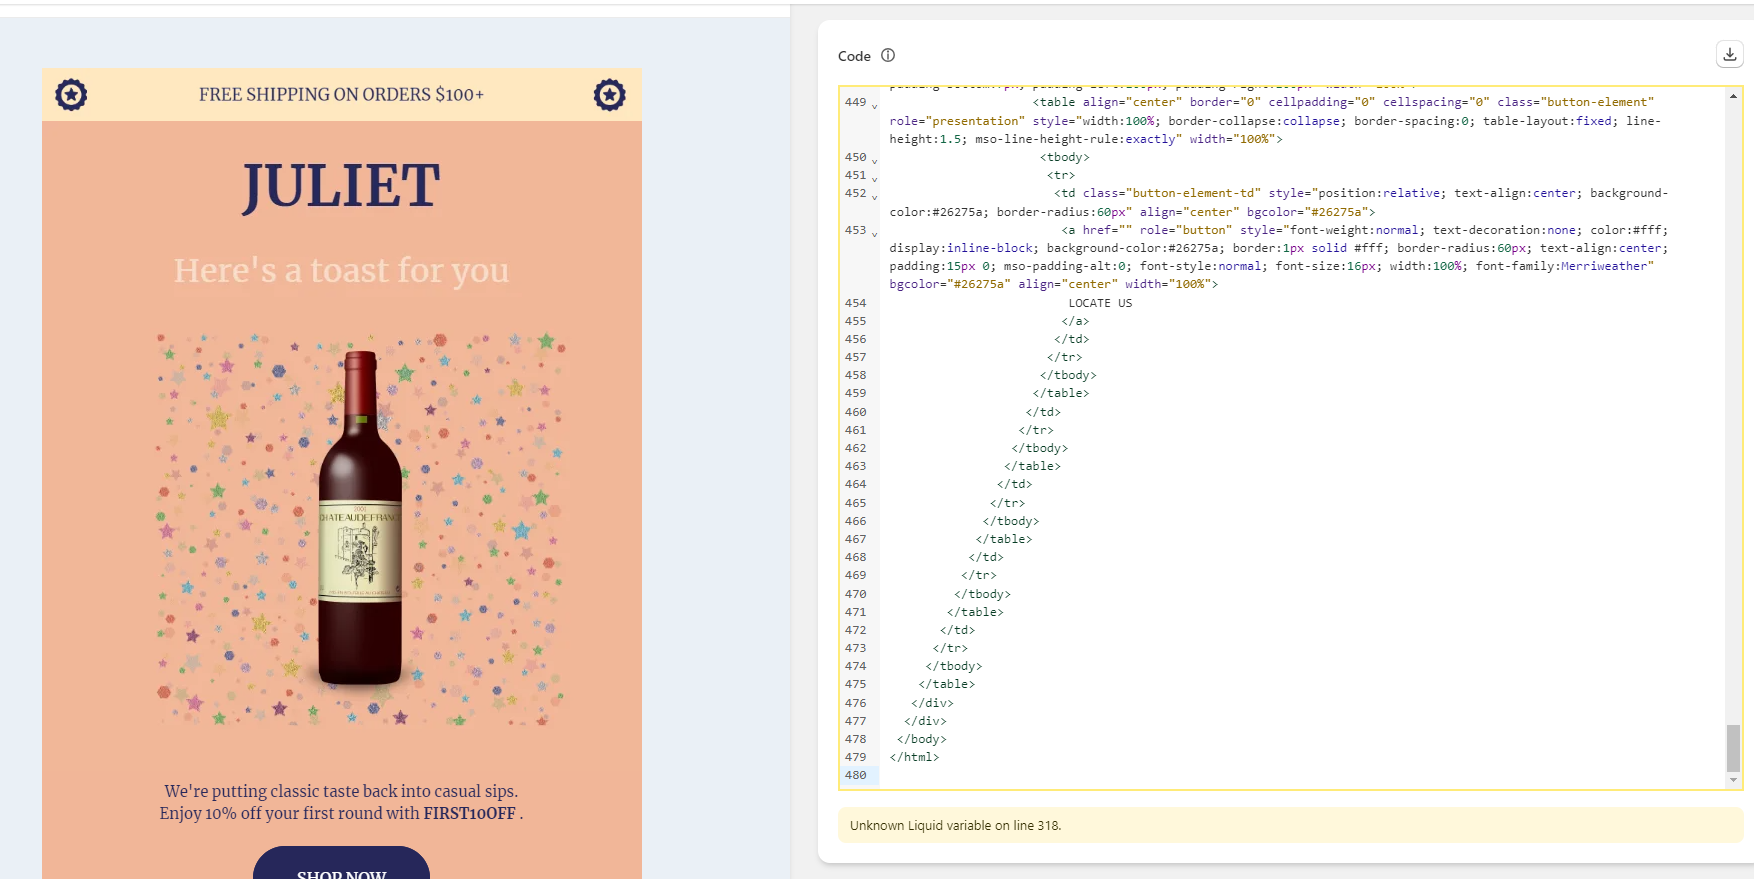
Email preview will be shown if code is valid.
Links
See the following links to better understand how to use custom HTML for Shopify Messaing.